文章目录
虽然有点晚了,但是还是分享一下之前折腾的本地运行一个大语言模型(LLM)语音助手的过程~
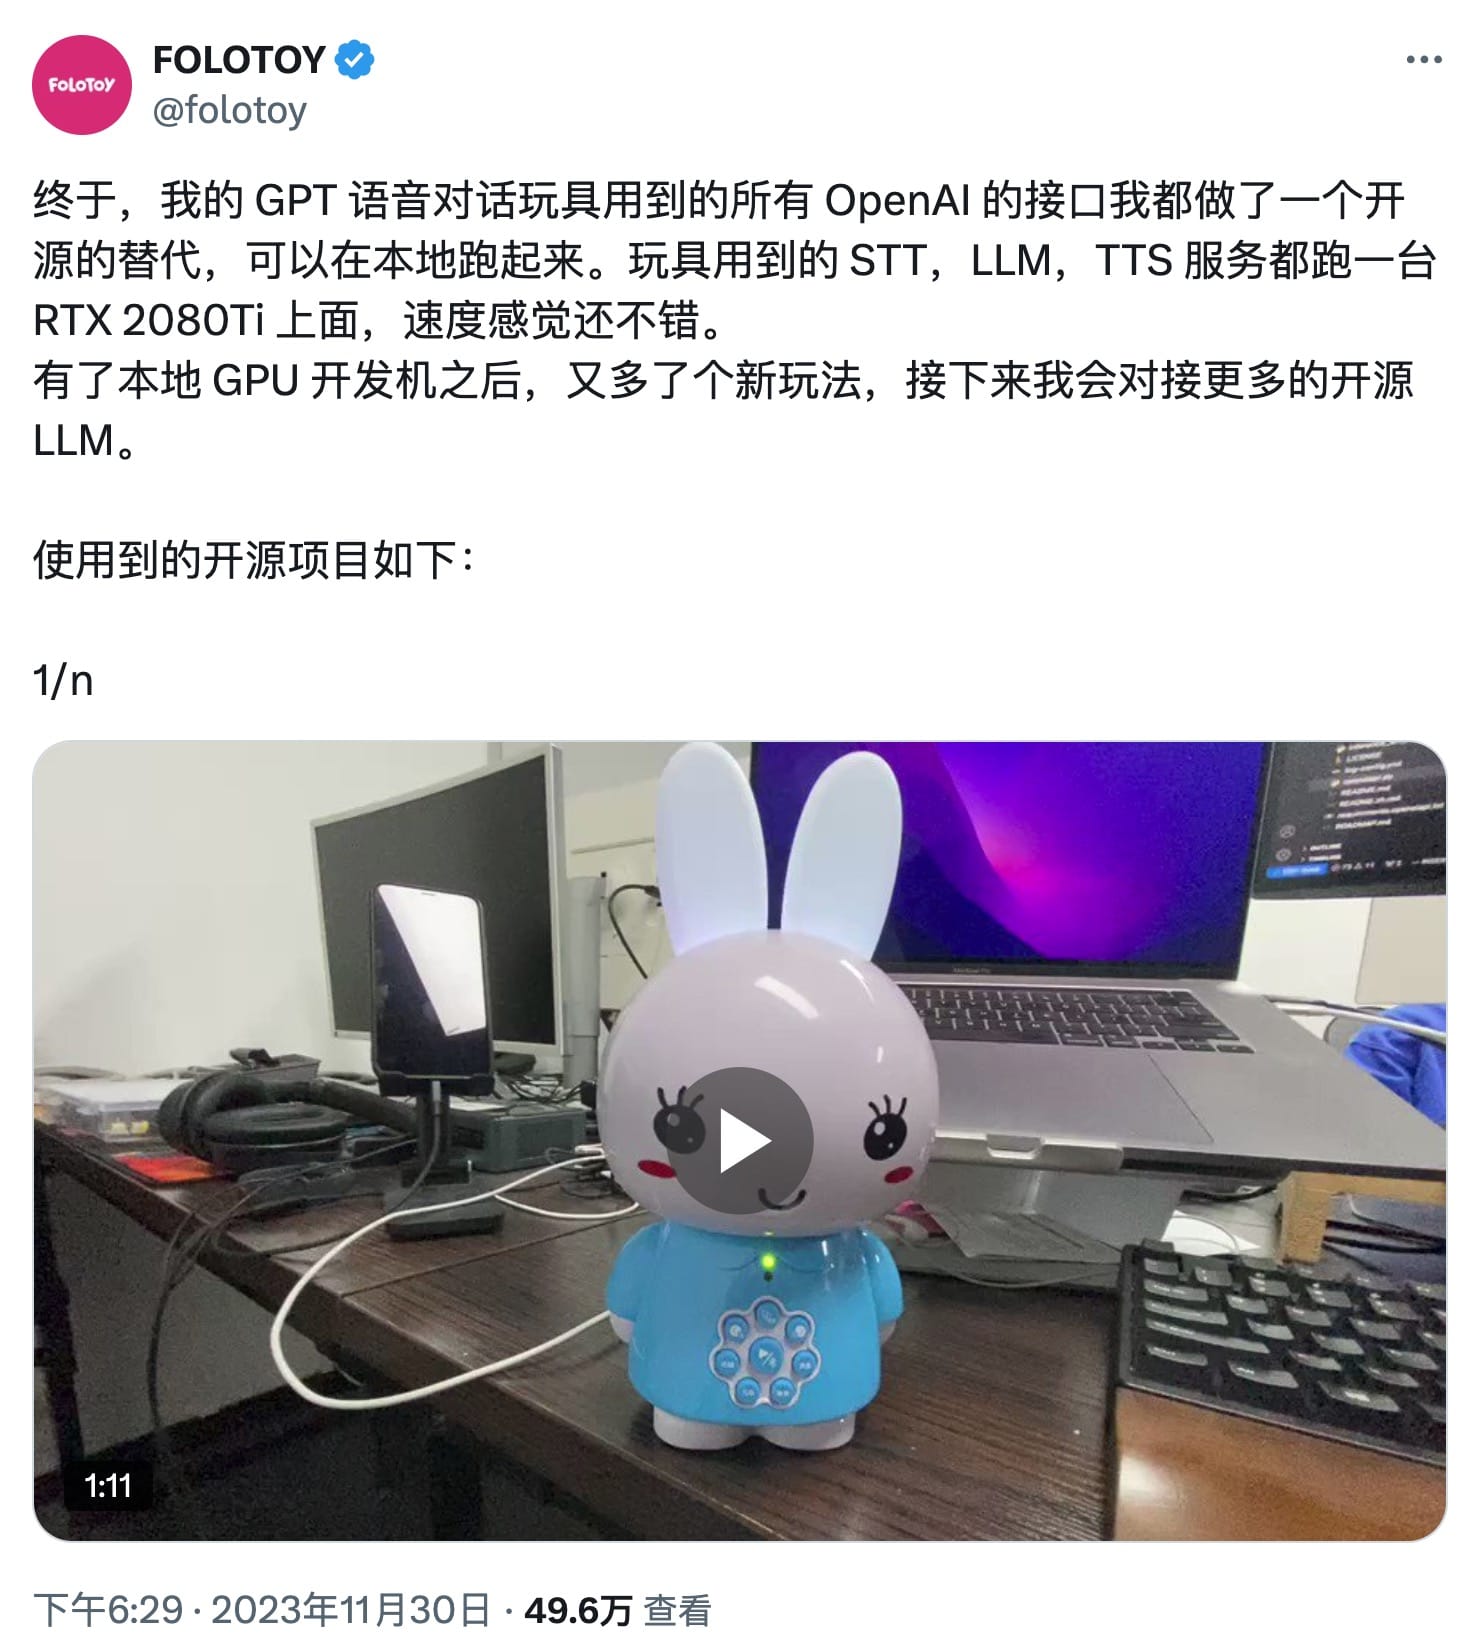
做这个来源于在推上看到有人分享了使用大语言模型搭建的语音助手,刚好也想试试大语言模型相关的库和代码什么的。

然后我参照推主的介绍,也使用相关的框架搭建了一个本地的语音助手,不过因为没有 GPU 以及测试的时候小参数量的大语言模型也不是很好用,因此 LLM 这块是使用的 OpenAI 的 API。
整体介绍
这个语音助手主要使用以下几个框架和服务:
- snowboy:用于声音检测、声音录制等功能,并且还支持静音检测(VAD)
- faster-whisper:用于语音转文本,这个是使用了 OpenAI 的 whisper 模型,并且重新实现的库,速度比官方的快很多
- SpeechRecognition:用来进行录音,在使用 snowboy 识别到唤醒词后,就用这个库来将后续的对话进行录制,交给 whisper 语音转文本
- EmotiVoice:文本转语音,将用户的对话内容通过 API 询问 GPT 之后,再将返回的文本内容生成语音并播放
- OpenAI:用来分析用户的对话并给出对应的回答
其中 fast-whisper 如果想要速度快的话,最好还是要有 Nvdia 的 GPU,使用 CPU 的话速度会慢不少,不过我在 M1 MacBook 上测试勉强能用。
snowboy
项目主页:https://github.com/Kitt-AI/snowboy
Snowboy is a customizable hotword detection engine for you to create your own hotword like "OK Google" or "Alexa".
snowboy 是一个可以自定义唤醒词的语音检测引擎,可以实现例如像小米音箱那样通过“小爱同学”来唤醒的功能,并且这个唤醒词还可以自定义,比如自定义一个“JARVIS”什么的,率先实现钢铁侠的智能助手 😃。
安装 snowboy 有一些步骤,将项目的仓库克隆下来之后,需要先安装 portaudio、pyaudio 和编译 swig 模块,以下是在 macOS 平台上的安装方法:
- 使用 brew 安装 portaudio:
brew install portaudio - 使用 pip 安装 pyaudio:
pip install pyaudio - 在
swig/Python3目录中运行make就可以直接完成编译。
然后在 examples/Python3 目录中已经有不少示例可以直接使用,例如使用自带的 snowboy 唤醒词:
python demo.py resources/models/snowboy.umdl
这样跑起来之后,就可以对着麦克风说 snowboy 来进入后续录音流程了。
自定义唤醒词
Snowboy Personal Wake Word Recorder: https://snowboy.hahack.com/
已经有热心网友直接做了一个网页来生成 snowboy 唤醒词的模型,可以通过上面的网址访问,录制三个音频后,就可以生成 snowboy 所需要的 umdl 模型了,试试做一个 JARVIS 吧~
使用 fast-whisper 语音转文本
项目主页: https://github.com/SYSTRAN/faster-whisper
faster-whisper is a reimplementation of OpenAI's Whisper model using CTranslate2, which is a fast inference engine for Transformer models.
This implementation is up to 4 times faster than openai/whisper for the same accuracy while using less memory. The efficiency can be further improved with 8-bit quantization on both CPU and GPU.
在使用 snowboy 识别到唤醒词并完成录音后,就需要将用户的语音转换为文本,再发给 ChatGPT API 进行问答了。
安装 fast-whipser 直接使用 pip 就可以了:
pip install faster-whisper要将语音转换为文本,直接使用仓库中的示例代码就可以:
from faster_whisper import WhisperModel

model_size = "small"

# Run on GPU with FP16
# model = WhisperModel(model_size, device="cuda", compute_type="float16")

# or run on GPU with INT8
# model = WhisperModel(model_size, device="cuda", compute_type="int8_float16")
# or run on CPU with INT8
model = WhisperModel(model_size, device="cpu", compute_type="int8")

segments, info = model.transcribe("audio.mp3", beam_size=5)

print("Detected language '%s' with probability %f" % (info.language, info.language_probability))

for segment in segments:
    print("[%.2fs -> %.2fs] %s" % (segment.start, segment.end, segment.text))
这里是使用了 CPU + int8 来运行这个模型,如果有 Nvdia 显卡的话可以考虑使用 cuda 加速。
得到文本之后,就可以将文本发送给 ChatGPT API 来得到用户问题的答案。
调用 OpenAI API
这里就是简单地将用户的问题发送给 Open API,拿到响应后直接输出给用户,代码非常简单:
from openai import OpenAI
client = OpenAI()

def openai_api(message):
    completion = client.chat.completions.create(
    model="gpt-3.5-turbo",
    messages=[
        {"role": "system", "content": "You are a voice assistant; please use concise language to answer questions."},
        {"role": "user", "content": message}
    ]
    )

    resp_msg = completion.choices[0].message.content
    print(resp_msg)
    return resp_msg
文本转语音
拿到 ChatGPT 返回的文本之后,还需要转换为语音播放出来,这里使用了网易开源的 EmoitVoice 库。
项目地址: https://github.com/netease-youdao/EmotiVoice
根据官方教程安装完 EmoitVoice 之后,为了让它变成一个 API Server 跑起来,再安装一些其他的依赖:
# 安装 ffmpeg 用来转 mp3
brew install ffmpeg
# 安装依赖
pip install fastapi pydub uvicorn
# 运行 API
python -m uvicorn openaiapi:app --reload
然后封装一个 API 请求代码:
import requests
import subprocess

# 设置API端点
api_endpoint = "http://127.0.0.1:8000/v1/audio/speech"

# 设置请求标头
headers = {
    "Content-Type": "application/json"
}

# 要转换的文本内容
text_to_convert = "你好,世界"

def emotivoice_api(text_to_convert):
    print("call emotivoice api")
    # 构建JSON请求体
    request_body = {
        "input": text_to_convert,
        "voice": "8051",
        "prompt": "", # 开心 / 悲伤
        "model": "emoti-voice",
        "response_format": "mp3",
        "language": "zh_us"
    }

    # 发送POST请求
    response = requests.post(api_endpoint, json=request_body, headers=headers)

    # 解析API响应
    if response.status_code == 200:
        # 从响应中获取语音文件
        audio_data = response.content
        # 处理语音数据,例如保存为文件或进行其他处理
        # 将语音数据保存为本地文件
        with open("output_audio.mp3", "wb") as audio_file:
            audio_file.write(audio_data)
        print("语音文件已保存为output_audio.mp3")
        subprocess.run(['afplay', 'output_audio.mp3'])
    else:
        print("API请求失败:", response.status_code, response.text)
连接 snowboy、fast-whisper、OpenAI 和 EmoitVoice
配置完每个组件之后,就是将它们连接起来,核心还是使用的 snowboy 示例代码,最重要的是其中的 audioRecorderCallback,在这个函数中,实现了整个语音对话流程:
def audioRecorderCallback(fname):
    print("converting audio to text")
    r = sr.Recognizer()
    with sr.AudioFile(fname) as source:
        audio = r.record(source)  # read the entire audio file
    # recognize speech using Whisper

    start_time = time.time()
    segments, info = whisper_model.transcribe(fname, beam_size=5)

    print("Detected language '%s' with probability %f" % (info.language, info.language_probability))

    fulltext = ""

    for segment in segments:
        fulltext += segment.text
        fulltext += "\n"
        print("[%.2fs -> %.2fs] %s" % (segment.start, segment.end, segment.text))
    print("time cost", time.time() - start_time)

    ai_msg = openai_api(fulltext)

    emotivoice_api(ai_msg)

    os.remove(fname)
至此,我们就完成了一个简单的大语言模型语音对话助手~
一键运行脚本
为了能快速地把这些组件都运行起来,我把上面这些安装步骤都写成了一个一键运行脚本,只要环境变量中有 python3.10 就可以快速跑起来,这个脚本主要会完成以下工作:
- 使用 brew 安装相关依赖
- 使用 pip 安装所有 python 依赖包
- 编译 snowboy Python wrapper
- 安装和配置 EmoitVoice
具体脚本内容可以开源项目仓库的文件。
已知问题
snowboy 项目只在 macOS 平台只提供了 x86_64 架构的静态库,因此在 M 系列 CPU 的 Mac 上无法编译,需要使用 Rosetta 方式运行。
开源项目
我把运行这个助手所有相关的代码都整理好放在 GitHub 仓库中,如何快速部署可以看项目中的 README。
项目地址: https://github.com/ohdarling/GPTVoiceChat
另外项目是在 macOS 14 + Python 3.10 环境下测试的,如果环境不太相同,在安装和运行时可能会碰到问题,这个时候需要自己解决一下啦~

0 条评论。