文章目录
之前看到 CodeGeeX2 大语言模型发布了,介绍说比上一个版本效果要好上不少,因此也想在本地跑一个看看,能不能在项目开发的流程中能应用一下。
CodeGeeX2 是多语言代码生成模型 CodeGeeX (KDD’23) 的第二代模型。不同于一代 CodeGeeX(完全在国产华为昇腾芯片平台训练) ,CodeGeeX2 是基于 ChatGLM2 架构加入代码预训练实现,得益于 ChatGLM2 的更优性能,CodeGeeX2 在多项指标上取得性能提升(+107% > CodeGeeX;仅60亿参数即超过150亿参数的 StarCoder-15B 近10%)
不过因为手上只有一个笔记本用的 Nvdia 显卡,型号是 3070,并且显存还只有 8G,因此在运行过程中相对更高显存的显卡会碰到一些坑,这里就记录一下整个安装过程、踩的坑和解决方法。
系统环境
我的笔记本安装了 Windows 10 系统,并且还没有安装 WSL,因此就直接在 Windows 系统中来安装和部署 CodeGeeX2 了。
软件和硬件环境:
- OS: Windows 10 22H2 (19045)
- Python:3.10.11
- CPU:AMD Ryzen 7 5800H
- 内存:32GB
- 显卡:RTX 3070 Laptop,8GB 显存
- 显卡驱动:NVDIA Studio 536.40
并且后续所有模型和测试相关文件,都会放到 E:\AI\CodeGeeX2 目录中。
安装 Python 环境
cd AI\CodeGeeX2

# 创建 VirtualEnv
python -m venv .venv

# 激活 VirtualEnv
.venv\Scripts\activate

# 安装依赖
pip install protobuf cpm_kernels torch>=2.0 gradio mdtex2html sentencepiece accelerate modelscope
克隆模型文件
这里可以直接使用 modelscope 的镜像,速度会比从 GitHub 克隆要快一些:
# 注意这里需要在 E:\AI\CodeGeeX2 目录中
git clone https://www.modelscope.cn/ZhipuAI/CodeGeeX2-6B.git
本来以为需要使用量化版本 codegeex2-6b-int4,但是后来在使用时,量化版本反而加载会出错,使用原始版本反而没问题。
踩坑记录
'ChatGLMTokenizer' object has no attribute 'tokenizer'
这个需要重新安装一个特定版本的 transformers 包来解决
pip uninstall transformers
pip install transformers==4.33.2
参考 issue:https://github.com/chatchat-space/Langchain-Chatchat/issues/1835
Torch not compiled with CUDA enabled
这是默认使用 pip 安装的 torch 包并没有包含 CUDA 支持,需要根据要安装的操作系统和 CUDA 版本,在 PyTorch 网站获取指定的安装命令来解决。
对于 Windows + Python + CUDA 11.8,可以使用以下命令来安装:
pip3 install torch torchvision torchaudio --index-url https://download.pytorch.org/whl/cu118RuntimeError: Library cublasLt is not initialized
通常这个错误发生时,打开任务管理器可以看到显存已经爆了,会直接冲到 8G 然后掉回去。
这个时候需要使用 8bit 量化方式运行模型,安装 accelerate 和 bitsandbytes 这两个包。
pip install accelerate
pip install bitsandbytes
在安装完后还是会提示找不到相关的 dll,需要下载预编译 dll 和修改一下 bitsandbytes 的源代码。
下载 libbitsandbytes_cuda116.dll
在 https://github.com/DeXtmL/bitsandbytes-win-prebuilt 下载预编译的 libbitsandbytes_cuda116.dll,并将它放到以下文件夹中:
.venv\Lib\site-packages\bitsandbytes在这个目录中已经有其他版本的 so 等文件,注意这个 dll 文件的文件夹和 要修改的源代码并不在同一个目录。
修改 evaluate_cuda_setup
文件路径:.venv\Lib\site-packages\bitsandbytes\cuda_setup\main.py

先找到 return libbitsandbytes_cpu.so,把这一行注释掉,并替换为以下内容:
if torch.cuda.is_available(): return 'libbitsandbytes_cuda116.dll', None, None, None, None需要注意 Python 代码的缩进要和上一行对齐。
修改 run_cuda_setup
文件路径:.venv\Lib\site-packages\bitsandbytes\cuda_setup\main.py
这个修改和上面是在同一个文件中。

在文件里搜索 ct.cdll.LoadLibrary(binary_path) ,这个有两处,都将它们替换为以下内容:
self.lib = ct.cdll.LoadLibrary(str(binary_path))同样需要注意对齐缩进。
参考文章:
- https://github.com/THUDM/ChatGLM-6B/issues/347
- https://github.com/oobabooga/text-generation-webui/issues/147
运行模型
使用代码调用 CodeGeeX2 生成代码
测试代码 test.py
from modelscope import AutoTokenizer, AutoModel
tokenizer = AutoTokenizer.from_pretrained("E:\AI\CodeGeeX2\CodeGeeX2-6B", trust_remote_code=True)
model = AutoModel.from_pretrained("E:\AI\CodeGeeX2\CodeGeeX2-6B", trust_remote_code=True).quantize(8).cuda()
model = model.eval()

# remember adding a language tag for better performance
prompt = "# language: Python\n# 用python写一个冒泡排序算法,并用中文逐行注释\n"
inputs = tokenizer.encode(prompt, return_tensors="pt", padding=True, truncation=True).to(model.device)
outputs = model.generate(inputs, max_length=256, top_k=1)
response = tokenizer.decode(outputs[0])

print(response)
运行测试代码
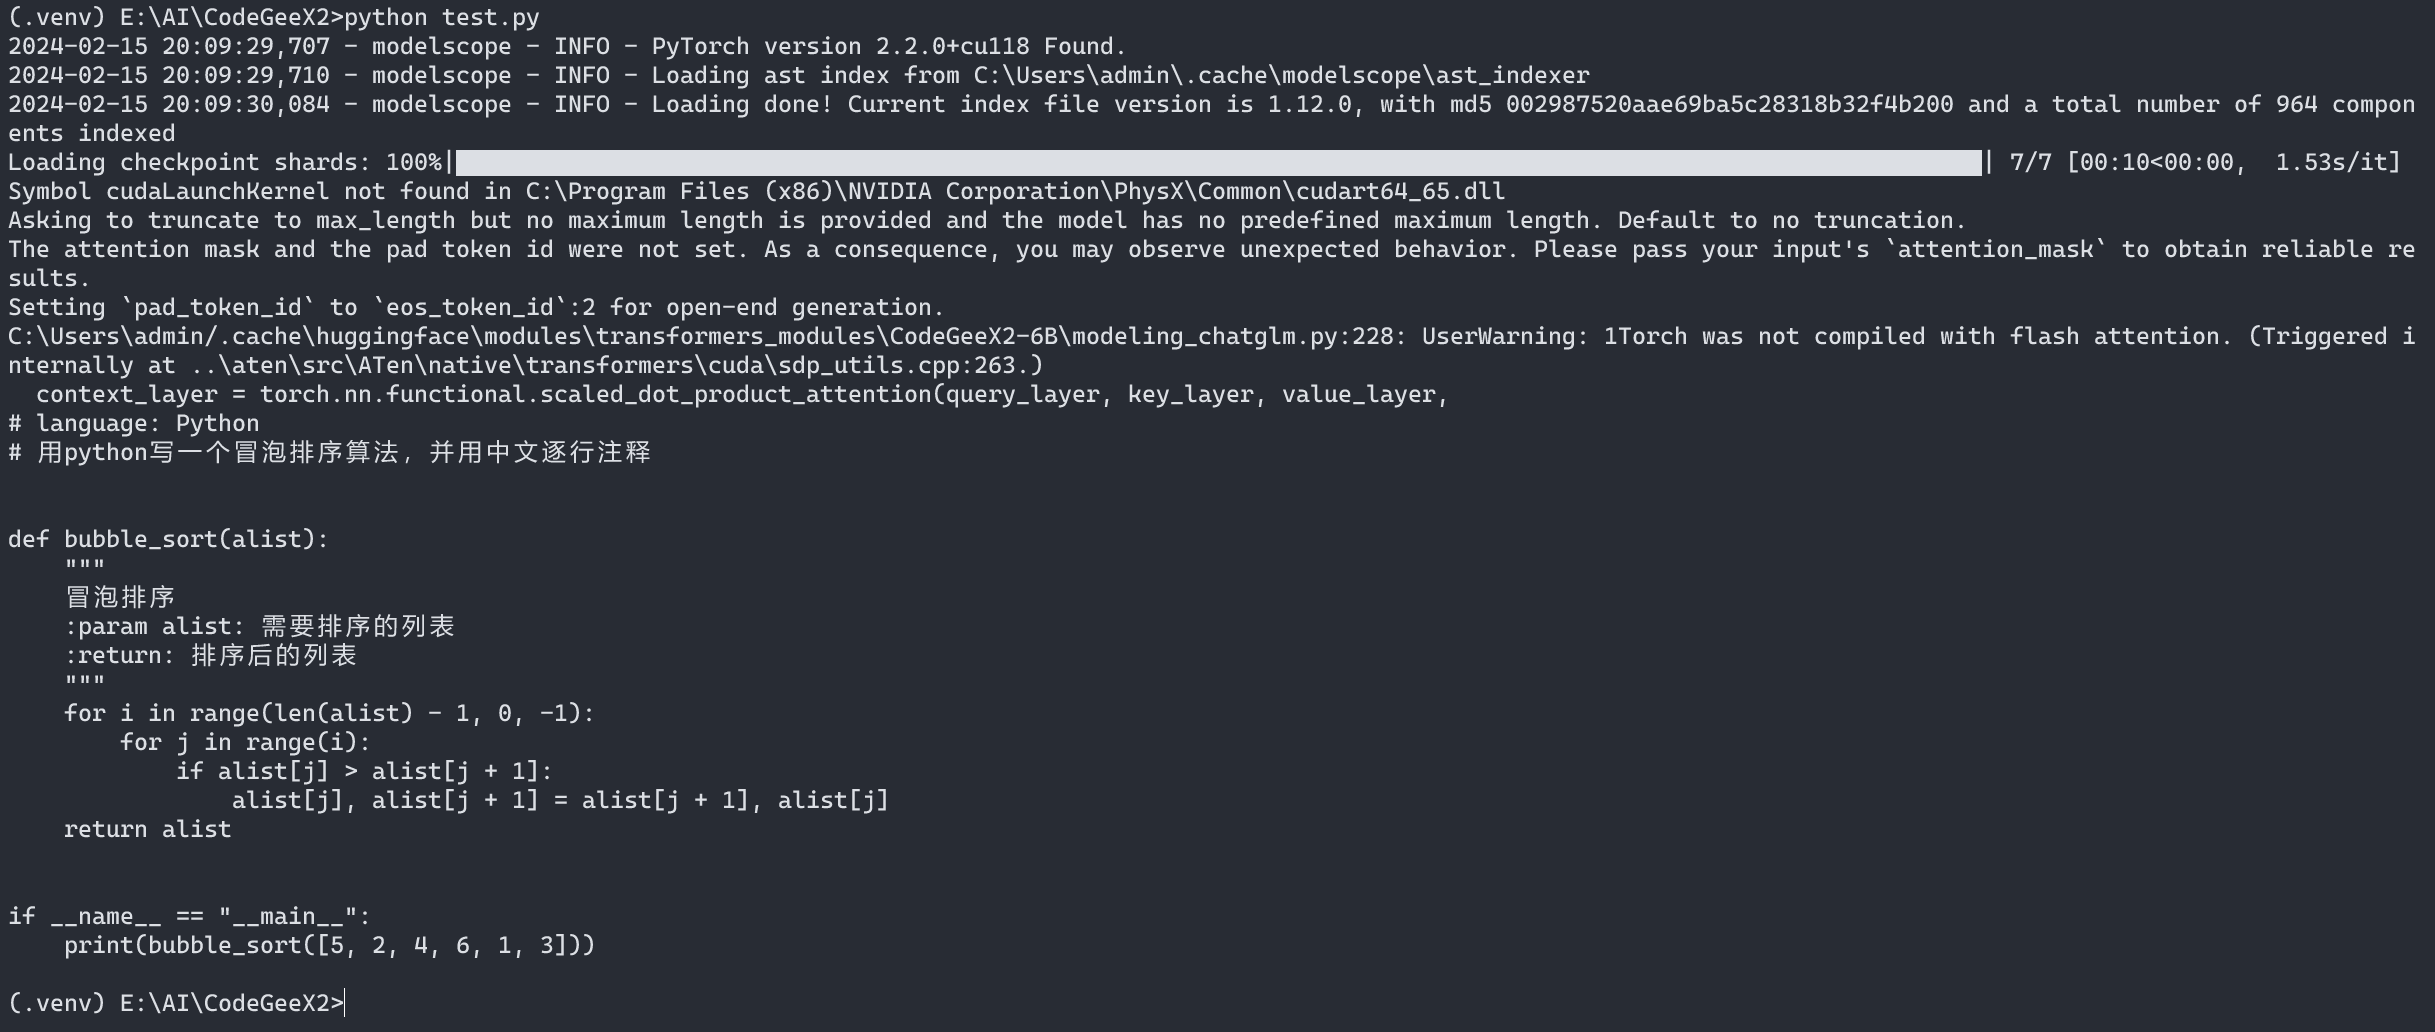
在命令行中通过 python test.py 就可以运行测试代码:

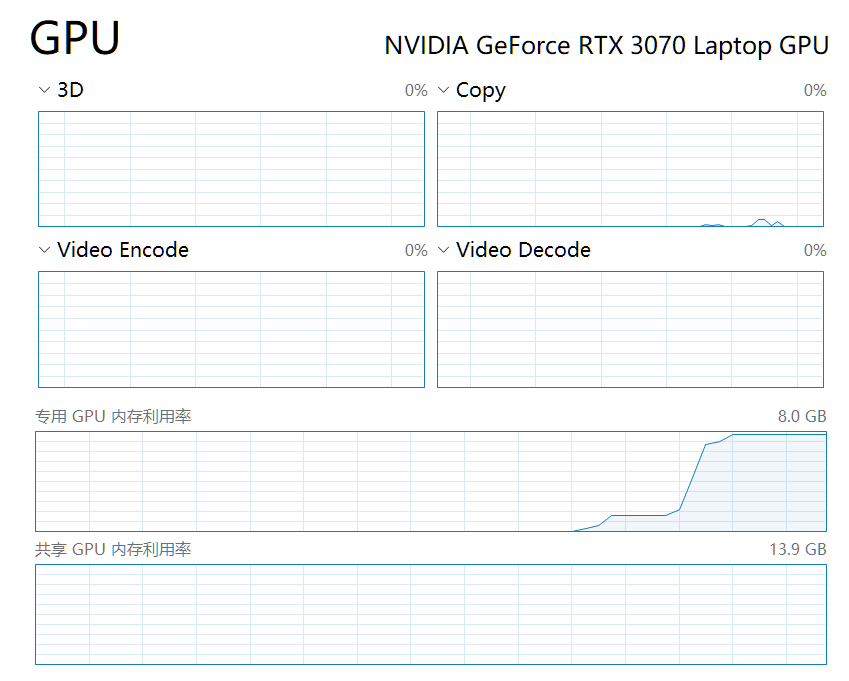
同时可以在任务管理器看到 GPU 显存占用逐渐就几乎到达 100%:

输出结果代码
# language: Python
# 用python写一个冒泡排序算法,并用中文逐行注释

def bubble_sort(alist):
    """
    冒泡排序
    :param alist: 需要排序的列表
    :return: 排序后的列表
    """
    for i in range(len(alist) - 1, 0, -1):
        for j in range(i):
            if alist[j] > alist[j + 1]:
                alist[j], alist[j + 1] = alist[j + 1], alist[j]
    return alist

if __name__ == "__main__":
    print(bubble_sort([5, 2, 4, 6, 1, 3]))
使用 API 调用 CodeGeeX2 生成代码
使用测试文件来测试就是会导致每次运行的时候都需要重新加载一次模型,这个过程还是比较费时间的,因此可以通过 FastAPI 来运行一个 API 服务器,这样就可以通过 HTTP 请求的方式来生成代码,避免每次都要重新加载模型文件。
API 服务器测试文件 api_test.py
from fastapi import FastAPI, Request
from modelscope import AutoTokenizer, AutoModel
import uvicorn, json, datetime
import torch

app = FastAPI()

@app.post("/")
async def create_item(request: Request):
    global model, tokenizer
    json_post_raw = await request.json()
    json_post = json.dumps(json_post_raw)
    json_post_list = json.loads(json_post)
    prompt = json_post_list.get('prompt')
    inputs = tokenizer.encode(prompt, return_tensors="pt", padding=True, truncation=True).to(model.device)
    outputs = model.generate(inputs, max_length=256, top_k=1)
    response = tokenizer.decode(outputs[0])
    now = datetime.datetime.now()
    time = now.strftime("%Y-%m-%d %H:%M:%S")
    answer = {
        "response": response,
        "status": 200,
        "time": time
    }
    log = "[" + time + "] " + '", prompt:"' + prompt + '", response:"' + repr(response) + '"'
    print(log)

    return answer

if __name__ == '__main__':
    tokenizer = AutoTokenizer.from_pretrained("E:\AI\CodeGeeX2\CodeGeeX2-6B", trust_remote_code=True)
    model = AutoModel.from_pretrained("E:\AI\CodeGeeX2\CodeGeeX2-6B", trust_remote_code=True).quantize(8).cuda()
    model = model.eval()
    uvicorn.run(app, host='127.0.0.1', port=7860, workers=1)
运行 API 服务器
在命令行中通过 python api_test.py 来运行 API 服务器,会提示已经 在 http://127.0.0.1:7860 这个地址上运行起来:

通过 API 请求获取结果
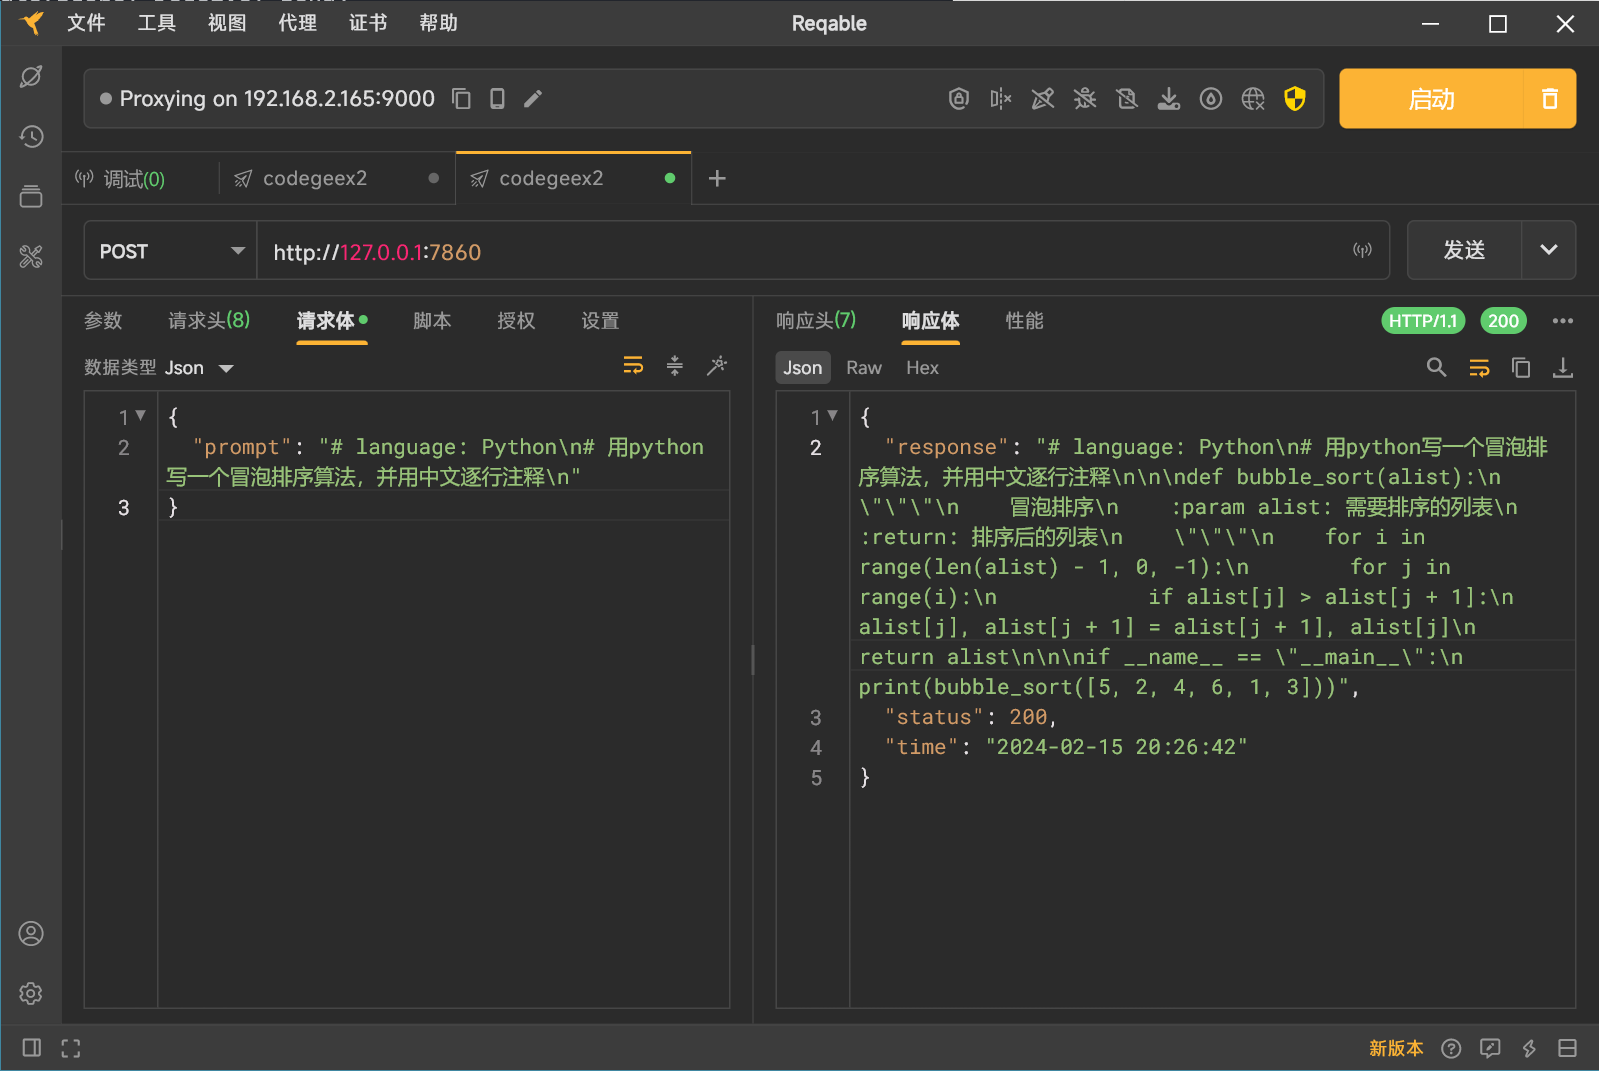
这个时候使用像 Reqable 的 API 测试工具,就可以发送一个请求给到服务器,来获取对应的代码生成结果了。

上面这个返回的 API 响应就跟之前使用单次测试生成的结果一样了。
小结
小显存跑大语言模型还是比较多坑的,配置跑模型的 Python 环境也比较复杂,感谢网上诸多已经踩过坑的前辈给出的各种解决方案。
另外使用了 GPU 加速的大语言模型,比单纯用 CPU 跑还是快很多的,这次只是使用 CodeGeeX2 简单测试一下代码生成能力,还没有深入使用,后续再深入使用了有经验之后再分享给大家。
参考资料
- https://blog.csdn.net/weixin_43734080/article/details/133776347
- https://www.modelscope.cn/models/ZhipuAI/CodeGeeX2-6B/files
- https://github.com/chatchat-space/Langchain-Chatchat/issues/1835
- https://github.com/pytorch/pytorch/issues/30664
- https://pytorch.org/
- https://github.com/THUDM/ChatGLM-6B/issues/88
- https://github.com/DeXtmL/bitsandbytes-win-prebuilt
- https://github.com/THUDM/CodeGeeX2
- https://codegeex.cn/

感谢博主,正在尝试在台式机,内存32G+RTX 3060…
主要看显存大小,内存还好。